
 我還蠻少在寫 GIMP 教學的,除了自己會的本來就不多,另一方面總覺得寫圖片編輯軟體的教學,會有大量的步驟跟圖片,還挺費時間,最近在短期內有兩次用到 GIMP 製作 Logo 倒影效果,由於中間要用到遮罩功能,而我對遮罩觀念還不熟(因為幾年才用到一次),所以兩次我都忘記要怎麼做,而透過網路文章的教學才完成,所以這次還是把這個過程給記錄起來好了,這樣下次就不用搜尋別人的文章了,哈。
先 show 完成圖,原始 Logo 與增加陰影後的 Logo


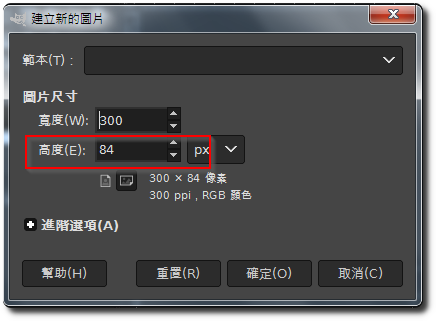
1. 「檔案」-「新增」,新增一個寬度跟原本 Logo 一樣,而高度要比原本的高 (要放倒影的空間)。
2. 將原始 Logo 複製後,選擇「編輯」-「貼上成為」-「新增圖層」,並將此圖層往上移到靠頂端的位置。

3. 再重複一次步驟2. 的動作,此圖層我暫命名為倒影。

4. 選擇”倒影”圖層,選擇「圖層」-「變換」-「垂直翻轉」,並將其上緣貼其原始 Logo 圖層的底部。
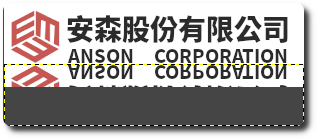
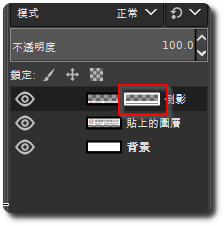
5. 選擇”倒影”圖層,選擇「圖層」-「遮罩」-「加入圖層遮罩」,選擇「白色(完全不透明)」,按確定。

6. 點選剛剛新增的遮罩。
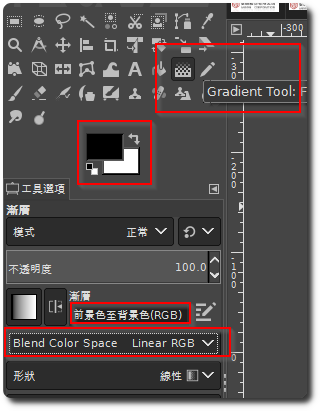
7. 選擇「Gradient Tool (漸層工具)」,確認下列設定值:
前景色:黑
背景色:白
漸層:前景色至背景色(RGB)
Blend Color Space:Linear RGB
形狀:線性
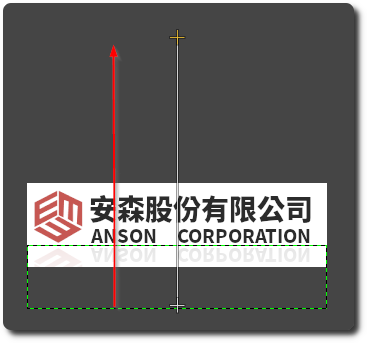
8. 按住 Ctrl (可確保拉出直線),從圖片底部按住左鍵往上拉出一條垂直線,可多試幾次直到達到自己想要的漸層效果。
這邊如果沒出現漸層效果,可確認幾個地方:
-1. 確認有做步驟6. ,要選到”遮罩”。
-2. 點選「選取」-「全不選」。
9. after finishing,即可輸出成想要的圖片格式。
【參考連結】
- 超簡單!影像精修設計美學–用GIMP就可以輕鬆完成你的設計夢想!(電子書) – Google 圖書

")
")


Leave a Reply