إصدار vCSA:7.0 U2 17694817
◎ قم بفك ضغط ملف ISO,執行 “vcsa-ui-installer win32 installer.exe”,يمكن تبديل اللغة في الزاوية اليمنى العليا。
◎ انقر فوق "تثبيت"。
![](https://it-help.tips/wp/wp-content/uploads/2021/04/20210414a01.png)
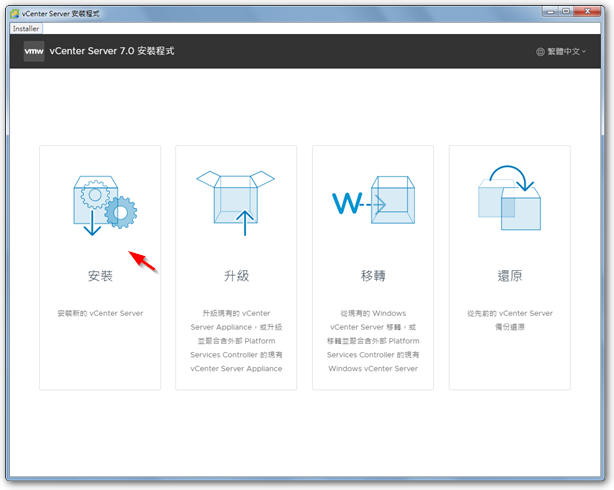
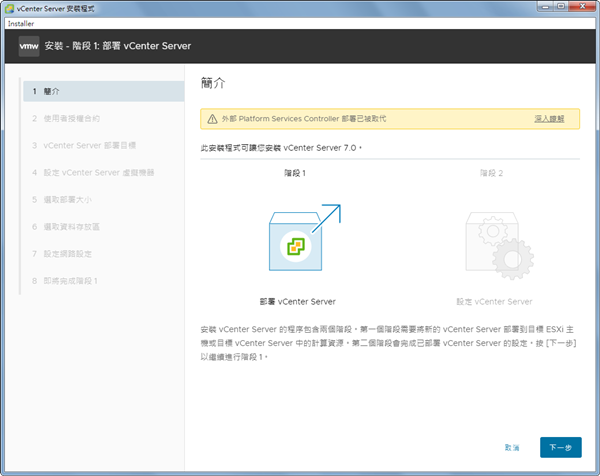
تنقسم عملية التثبيت إلى مرحلتين。
![](https://it-help.tips/wp/wp-content/uploads/2021/04/20210414a02.png)
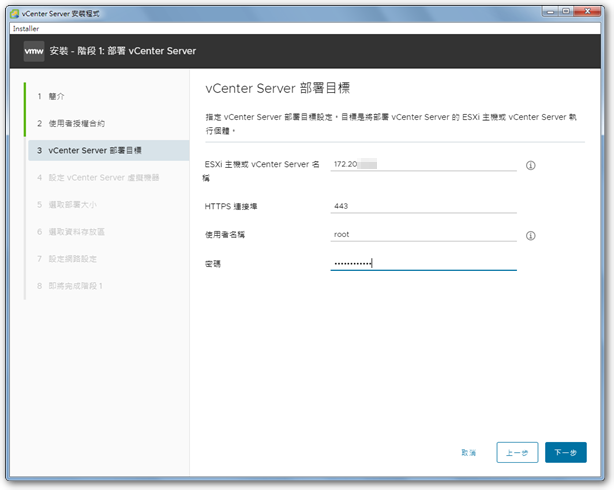
◎ أدخل معلومات مضيف ESXi ليتم تخزينها بواسطة vCSA。
![](https://it-help.tips/wp/wp-content/uploads/2021/04/20210414a03.png)
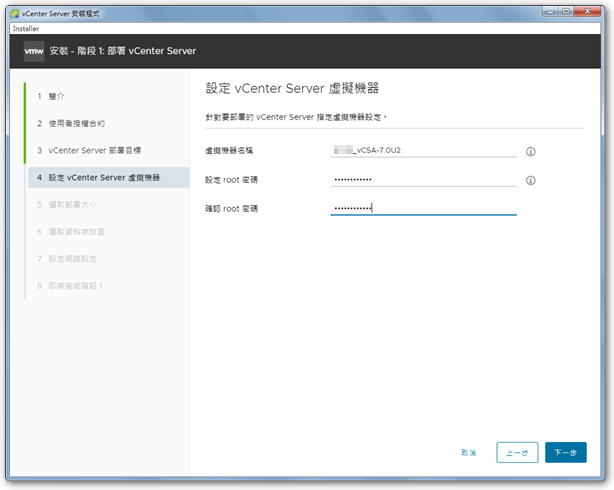
◎ أدخل معلومات vCSA。
![](https://it-help.tips/wp/wp-content/uploads/2021/04/20210414a04.png)
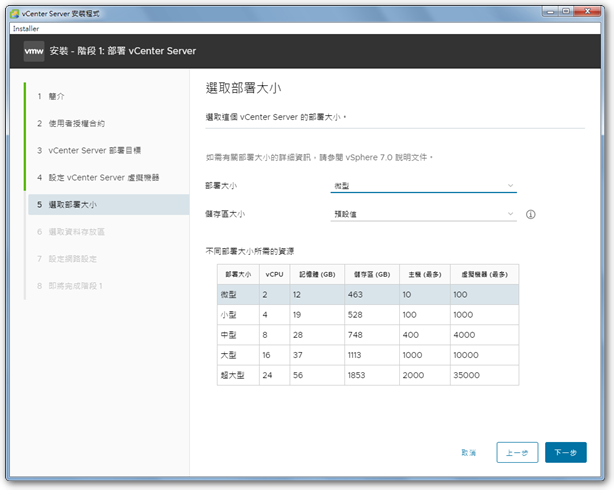
◎ اختر خيارات الموارد المناسبة وفقًا للاقتراحات。
![](https://it-help.tips/wp/wp-content/uploads/2021/04/20210414a05.png)
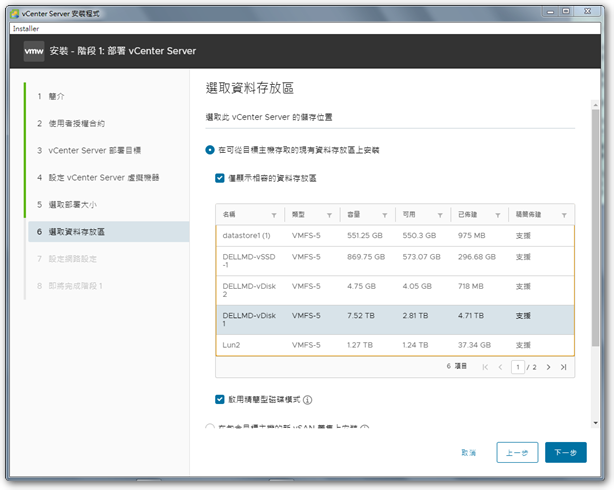
حدد مخزن البيانات لتخزين vCSA,وتحقق من الوضع المضغوط لتوفير مساحة على القرص الصلب。
![](https://it-help.tips/wp/wp-content/uploads/2021/04/20210414a06.png)
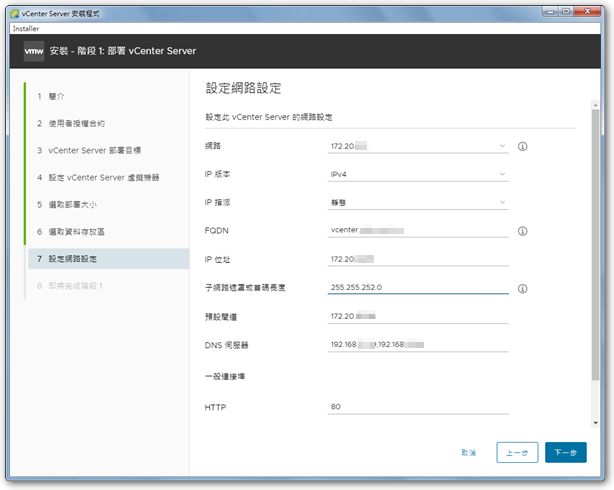
◎ إعدادات شبكة vCSA。
![](https://it-help.tips/wp/wp-content/uploads/2021/04/20210414a07.png)
تأكد من صحة المعلومات。
![](https://it-help.tips/wp/wp-content/uploads/2021/04/20210414a08.png)
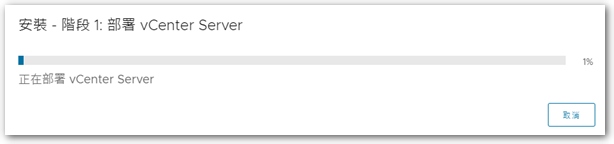
◎ ابدأ المرحلة الأولى من عملية الترقية ، وقم ببناء vCSA جديد。
![](https://it-help.tips/wp/wp-content/uploads/2021/04/20210414a09.png)
◎ بعد الانتهاء,انتقل إلى المرحلة الثانية من إعداد vCSA。
![](https://it-help.tips/wp/wp-content/uploads/2021/04/20210414a10.png)
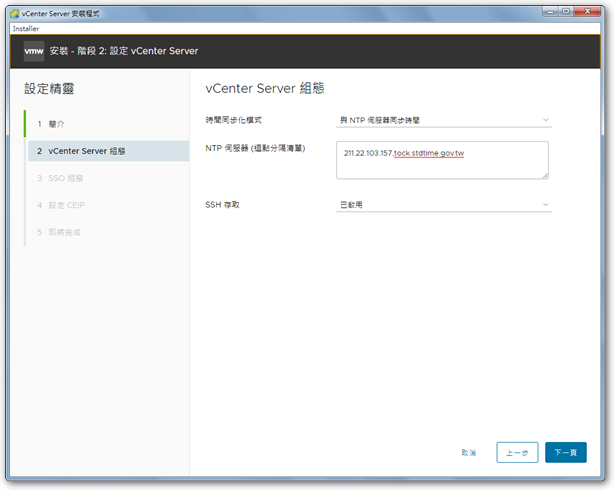
◎ تكوين تكوين vCenter。
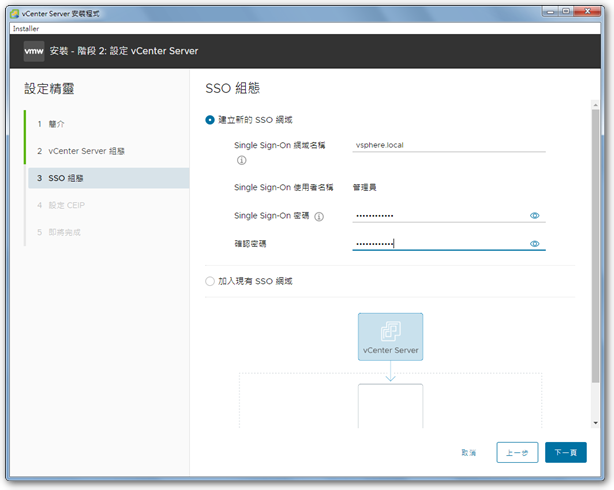
![](https://it-help.tips/wp/wp-content/uploads/2021/04/20210414a11.png)
◎ تعيين تكوين SSO。
![](https://it-help.tips/wp/wp-content/uploads/2021/04/20210414a12.png)
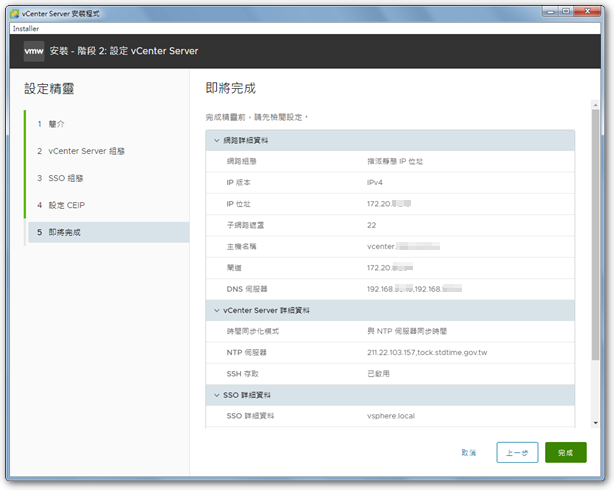
◎ أكمل التأكيد النهائي。
![](https://it-help.tips/wp/wp-content/uploads/2021/04/20210414a13.png)
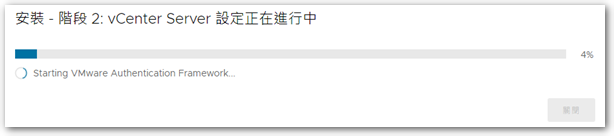
◎ بعد الانتهاء ، سيكتمل تثبيت vCSA。
![](https://it-help.tips/wp/wp-content/uploads/2021/04/20210414a14.png)
【參考連結】
- قم بترقية vCenter Server Appliance 6.5 إلى 7.0 | سين القديمة تشانغ تان